To our dear German readers out there – how do you rate my efforts?? 😇
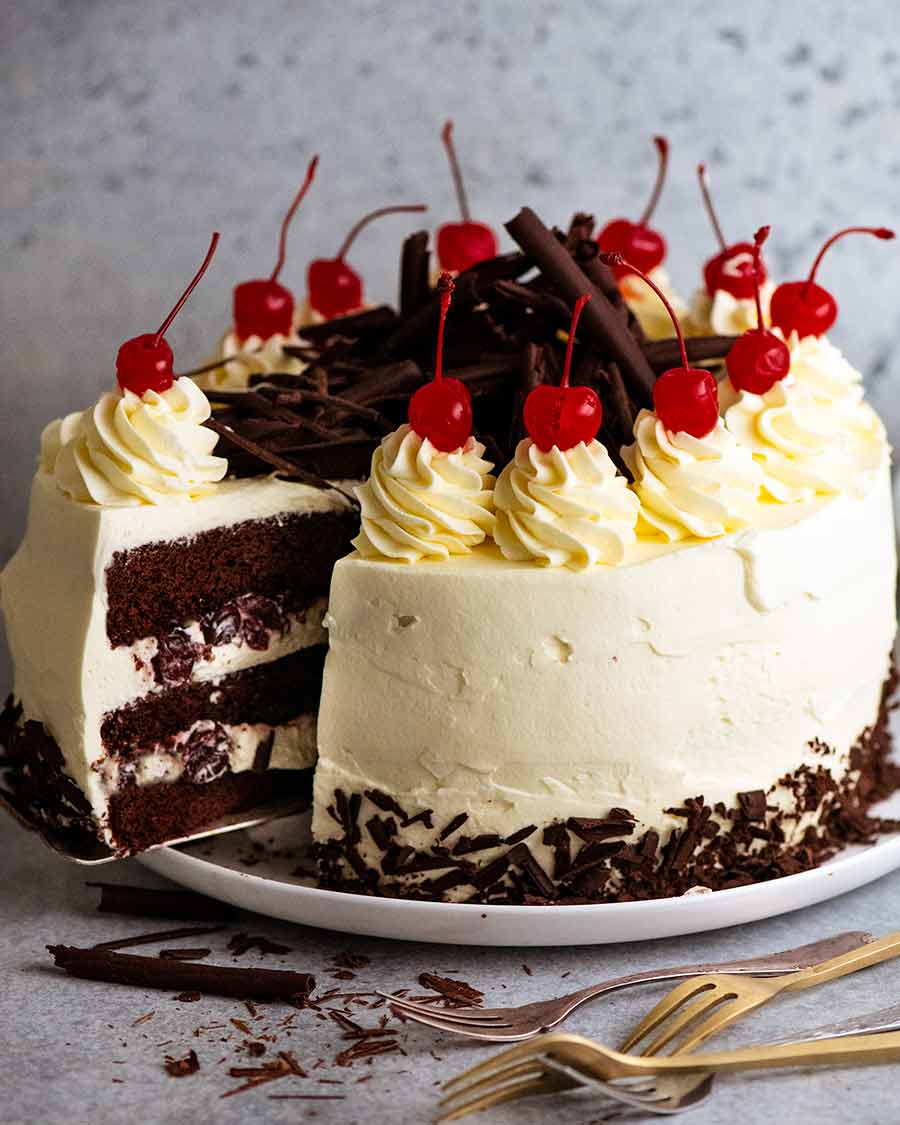
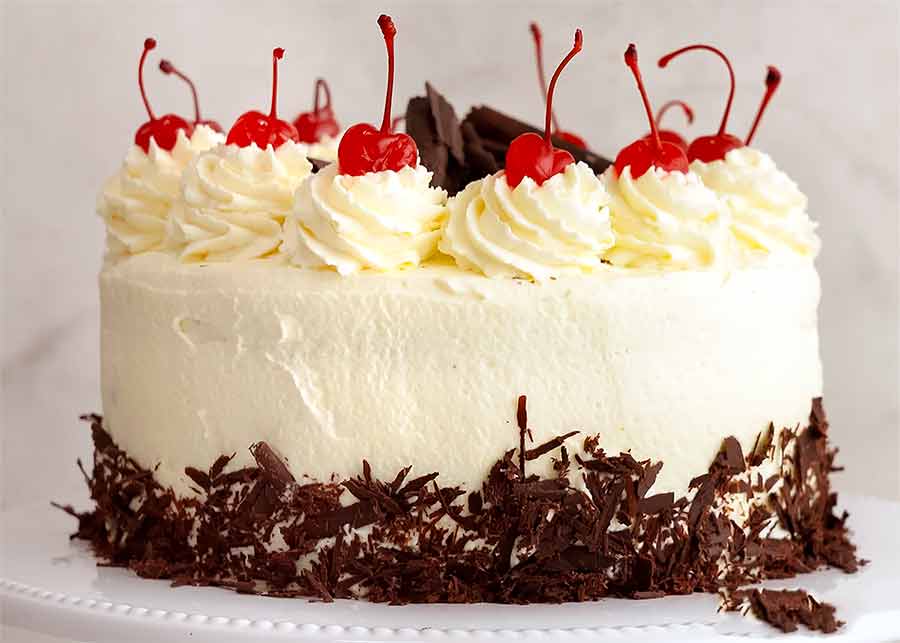
Black Forest Cake
I’ve never been completely happy with Black Forest Cake recipes I’ve tried in the past, whether it be traditional German cookbooks, recipes by notable bakers, or online sources. Niggly shortcomings seem to plague recipes for this cake. Often the cake layers are too dry (a very common offender). Other times it isn’t constructed right. Or the wrong type of cherries are used. Or – and the biggest issue for me – the cake is just far too sweet and the nuclear sugar levels obliterate everything. So I gathered the best features that I want in a Black Forest Cake and constructed what I think is The Perfect Black Forest Cake. Here’s what makes it so!
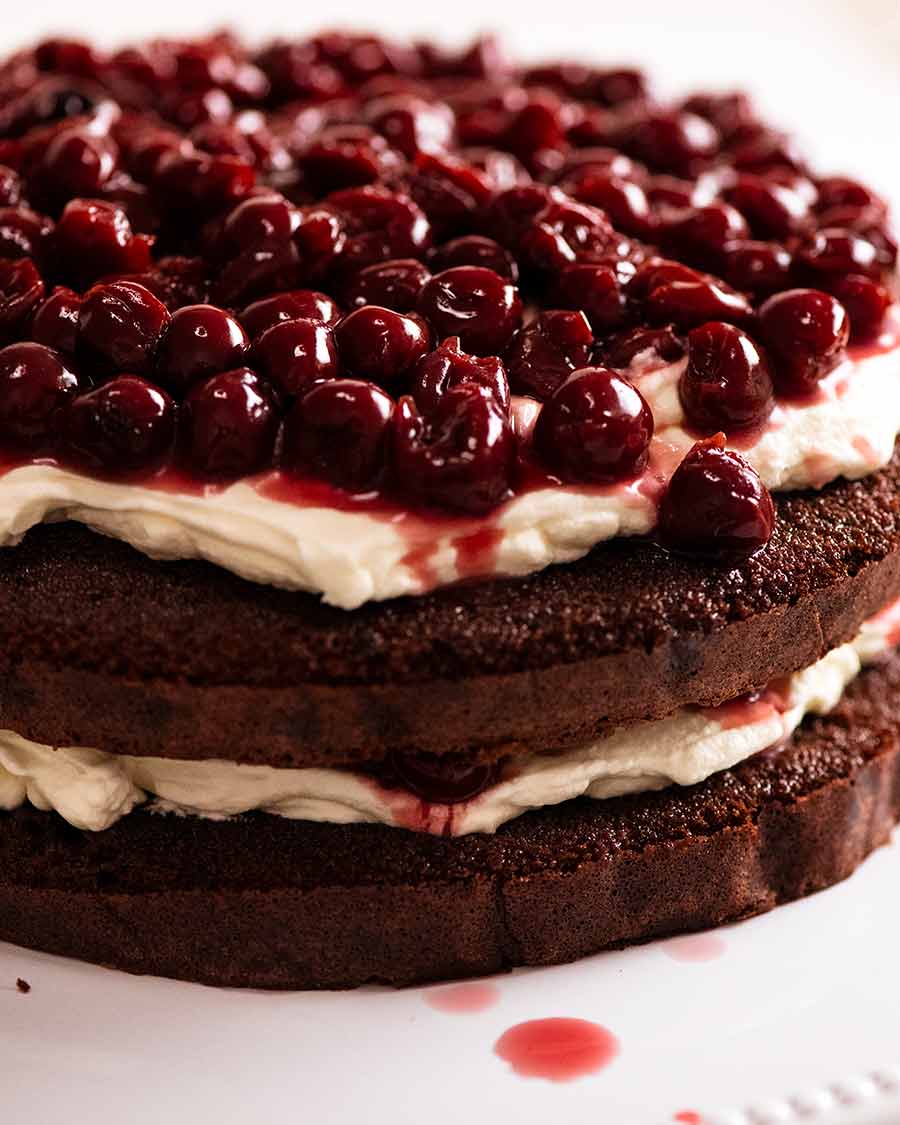
Three chocolate cake layers – Tender and moist layers that are still sturdy enough to hold up to the (considerable!) mass of toppings and the all-essential cherry syrup soaking. The sponge is chocolate-y but not overwhelmingly so (save that kind of excess for Chocolate Cake!);Cherry syrup that actually tastes of cherries, not just tooth-aching sweetness from sugar;Vanilla cream, just lightly sweetened (notice a theme here?); andJarred rather than fresh cherries – Jarred cherries simply work better in this cake from a textural point of view. They’re softer, juicier and make much more sense to your mouth when you eat the cake. I tried fresh cherries in their prime during summer and they honestly weren’t as good!
If all this sounds pretty good to you, then I dare say this might also just be YOUR idea of a perfect Black Forest Cake too!
What goes in Black Forest Cake
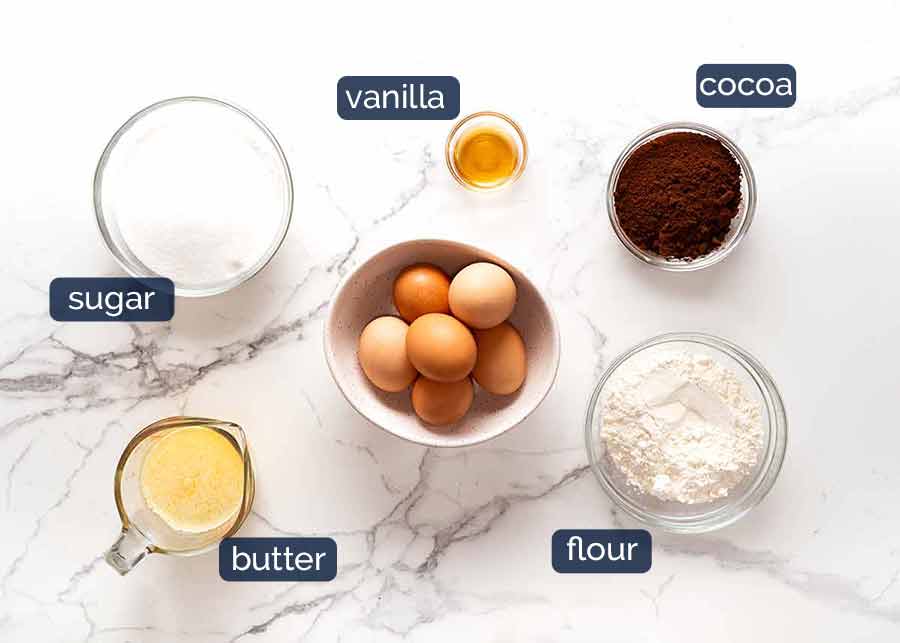
1. Chocolate cake layers
Here’s what you need to make the three cake layers: Nothing groundbreaking here! Just a note on a couple of things:
Eggs – Make sure they are what’s sold as “large eggs”, which are 55 – 60g / 2oz each. These are industry-standard sizes in Australia and the US. If your eggs are significantly larger or smaller in size, just weigh different eggs and use 330 – 360g / 12 oz in total (including shell) or 300 – 325g / 11 oz in total excluding shell (this is useful if you need to use a partial egg to make up the total required weight. Crack eggs, beat whites and yolks together, THEN pour into a bowl to measure out what you need).Use at room temperature – Eggs need to be at room temperature and not fridge-cold, because they aerate better when beaten. This is particularly important for Black Forest Cake because the sponge layers rely solely on the eggs to make them rise; they do not use baking powder or baking soda like other cakes do. A quick way to warm up fridge-cold eggs: Place eggs in a large bowl, cover with warm tap water (just warm, not hot) and leave for 5 minutes. Wipe dry (to avoid residual water dripping into bowl), then use per recipe; andCocoa – Use Dutch process cocoa powder if you can because the colour and flavour is more intense than regular cocoa powder. Regular, unsweetened cocoa powder can however be used here instead – there’s plenty of other flavours going on so it won’t compromise the outcome!
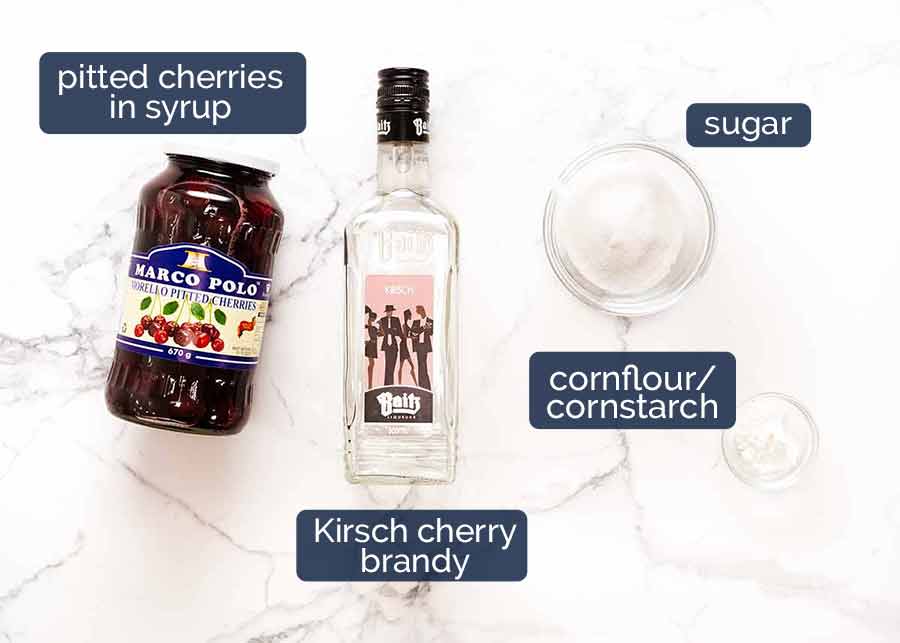
2. Cherry layer and syrup
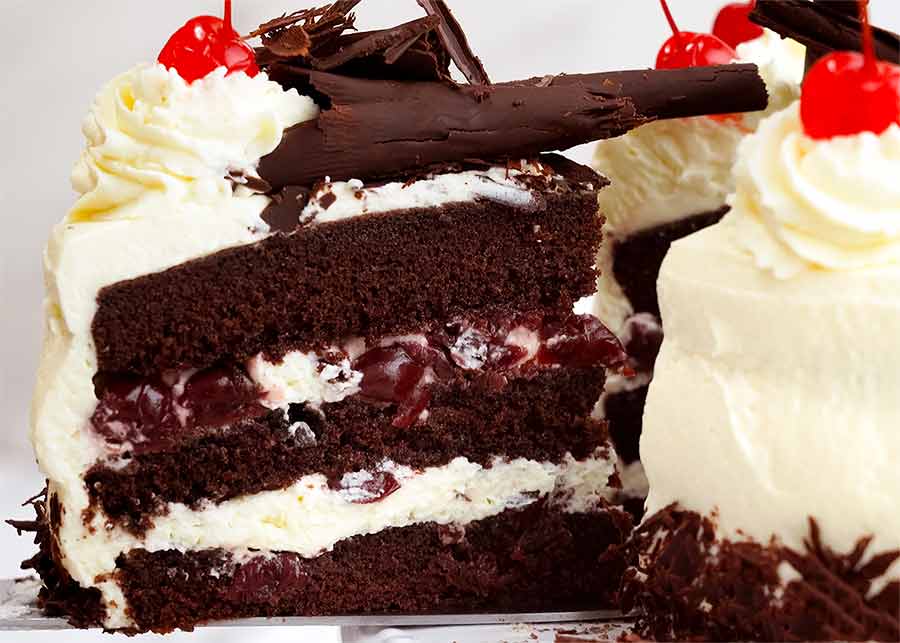
Black Forest Cake is sandwiched with cherries, and the cake layers are also soaked with cherry syrup which imparts flavour and moisture to the sponge layers which are often (sadly!) too dry otherwise. Here’s what you need: Use at room temperature – Eggs need to be at room temperature and not fridge-cold, because they aerate better when beaten. This is particularly important for Black Forest Cake because the sponge layers rely solely on the eggs to make them rise; they do not use baking powder or baking soda like other cakes do. A quick way to warm up fridge-cold eggs: Place eggs in a large bowl, cover with warm tap water (just warm, not hot) and leave for 5 minutes. Wipe dry (to avoid residual water dripping into bowl), then use per recipe; and Just a note on a couple of items:
Morello / sour cherries in a can or jar, in syrup or juice – Yes, jarred not fresh cherries! I’ve tried this cake with fresh cherries and although lovely when summer cherries are in their prime, the cake just isn’t the same. Canned fruits are softer and juicier, and just make more sense here. Even when fresh cherries are cooked down to make a sauce (like I do with blueberries) the texture just wasn’t as good. So, canned cherries it is! Also, we use the flavoured syrup from the jar as the base for the cherry syrup used to brush the cake layers.Can’t find canned cherries? Use frozen pitted cherries + cherry juice instead. Thaw completely (reserve liquid). Top up using cherry juice to make up the cherry liquid called for in the recipe;Kirsch or cherry liqueur – This is a German-origin, cherry-flavoured brandy. Authentic Black Forest Cake uses it in the cherry syrup. If you prefer not to use alcohol, just substitute with more reserved cherry juice.
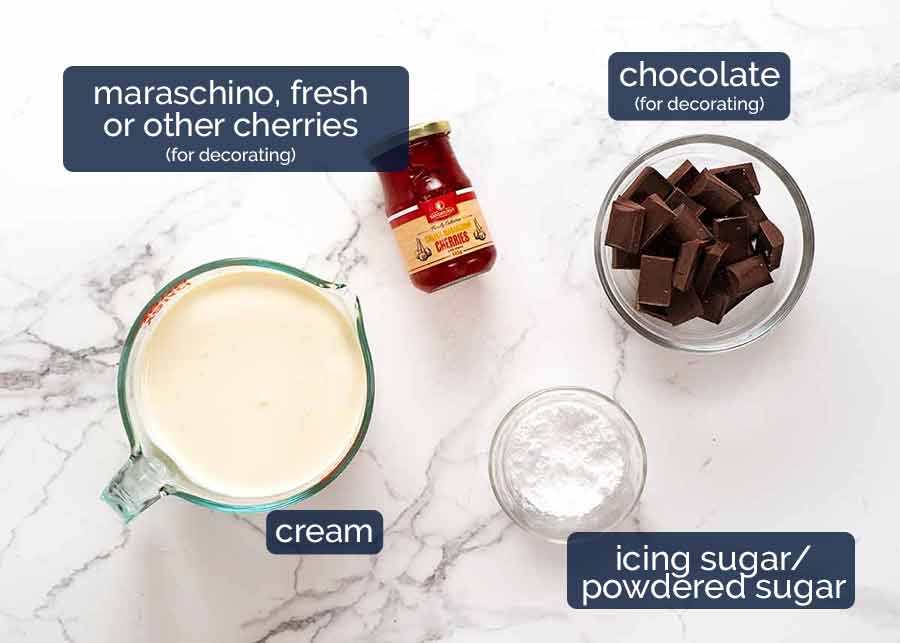
3. Decorations!
Cream – We need a hefty amount of cream for this recipe! It’s only lightly sweetened with icing sugar so isn’t overly heavy or rich.This recipe does not call for stabilised cream (ie. where the aeration of cream is stabilised using gelatine or cornflour; there’s a few methods). I prefer the pure, unadulterated flavour of plain whipped cream. It does however lose aeration after a few days. Using heavy / thickened cream rather than pure cream helps the cream to maintain its form.Having said that, the cake is still perfectly scoff-able even on Day 4! I just wouldn’t take it to an event to impress. 🙂If you want to use stabilised cream which will hold its form near perfectly for 3 to 4 days, here is the recipe I use (it’s a PDF document, I will publish it properly one day!);Cherries for decorating – Use any cherries you want here. I’ve opted for maraschino cherries both for their merry, vivid red colour (love it!) and also because cherries are out of season right now here. I’d definitely use fresh cherries if I could get my hands on them!Chocolate – For making curls or shavings to use in decorating!
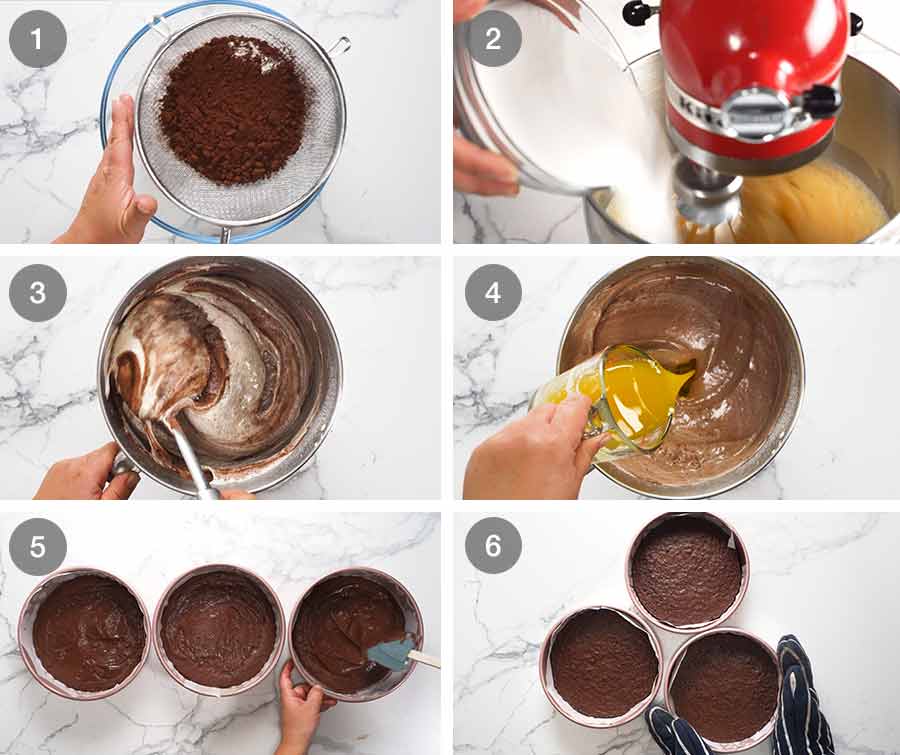
How to make Black Forest Cake
1. Chocolate sponge cake layers
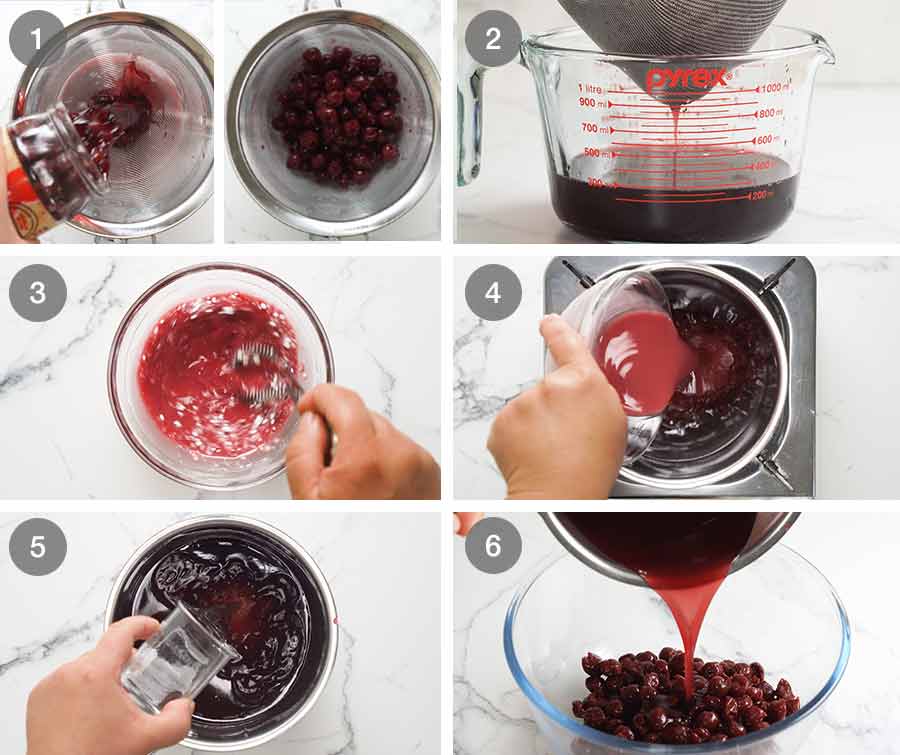
2. Cherry syrup and cherries
While the cake is baking / cooling, prepare the cherries and syrup for sandwiching. Also, we use the flavoured syrup from the jar as the base for the cherry syrup used to brush the cake layers. Can’t find canned cherries? Use frozen pitted cherries + cherry juice instead. Thaw completely (reserve liquid). Top up using cherry juice to make up the cherry liquid called for in the recipe; This is why the soaking the sponge with cherry syrup is such an important step. It’s not just for flavour, but also to moisten the sponge cake layers! This recipe does not call for stabilised cream (ie. where the aeration of cream is stabilised using gelatine or cornflour; there’s a few methods). I prefer the pure, unadulterated flavour of plain whipped cream. It does however lose aeration after a few days. Using heavy / thickened cream rather than pure cream helps the cream to maintain its form. Having said that, the cake is still perfectly scoff-able even on Day 4! I just wouldn’t take it to an event to impress. 🙂 If you want to use stabilised cream which will hold its form near perfectly for 3 to 4 days, here is the recipe I use (it’s a PDF document, I will publish it properly one day!); Bake for 25 minutes at 180°C / 350°F (160°C fan). If your oven is not large enough to fit 3 cake pans on one shelf, do as I do: Put 2 pans in the middle shelf, and one on a lower shelf right underneath. Take the top 2 pans out at 25 min, and leave the bottom cake pan in for an extra 2 minutes; Then turn the cake out onto cooling racks, and allow to cool fully before assembling!
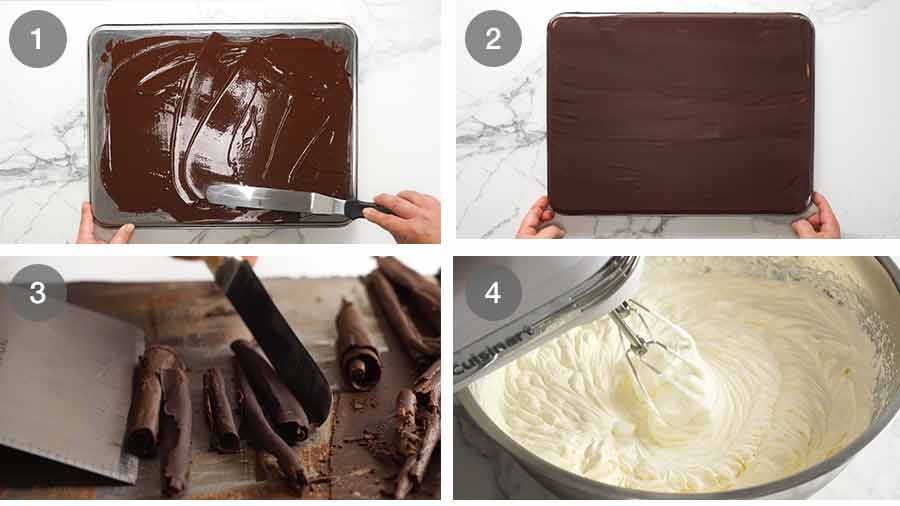
3. Chocolate curls (optional)
This step is entirely optional because it does take a bit of practice. If you’re having trouble making curls, don’t fret. Even if they don’t work out, you’ll at the very least be left with chocolate shavings which still look GREAT on Black Forest Cakes. In fact, most Black Forest Cakes are decorated with chocolate shavings rather than fancier curls! Then add the cornflour slurry and bring to a simmer. Cook for 1 minute or until it thickens into a thin syrup. We want the syrup to be quite thin so it soaks the cake layers all the way through rather than settling on top;
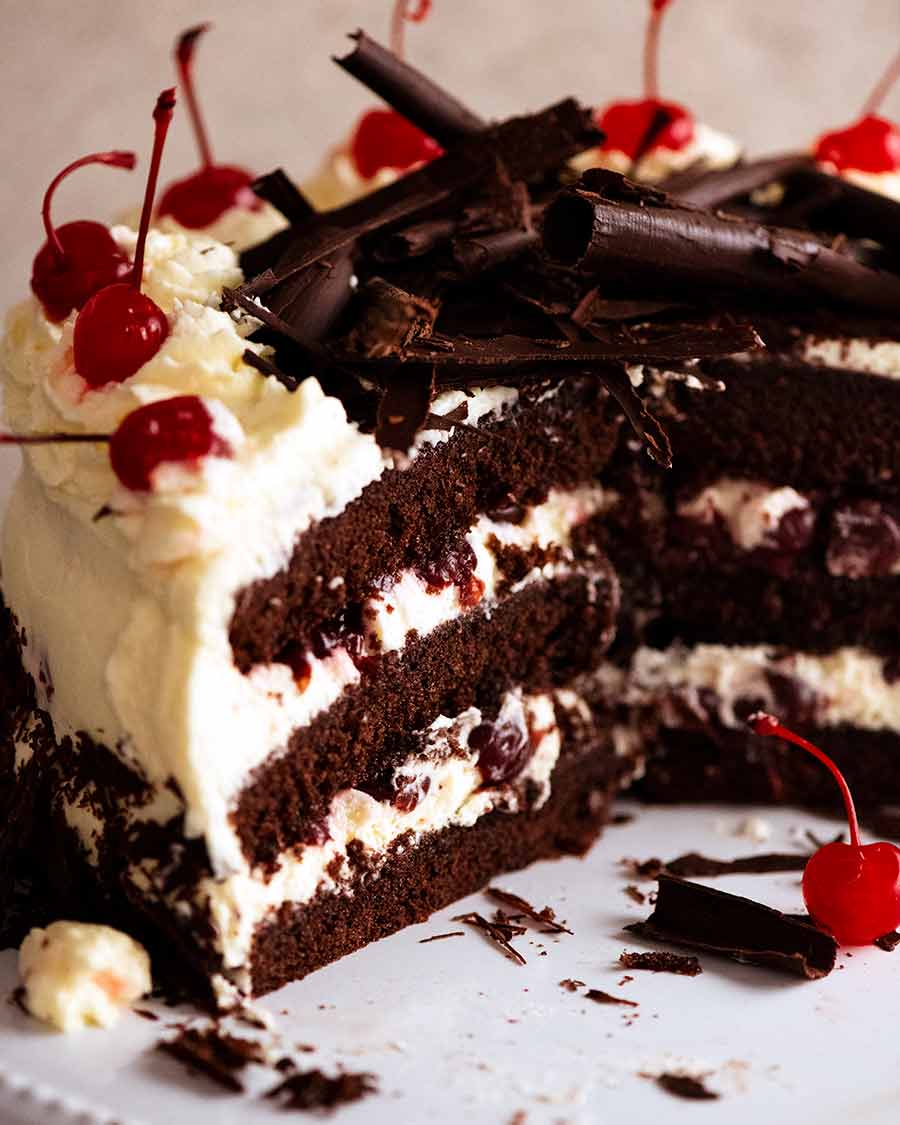
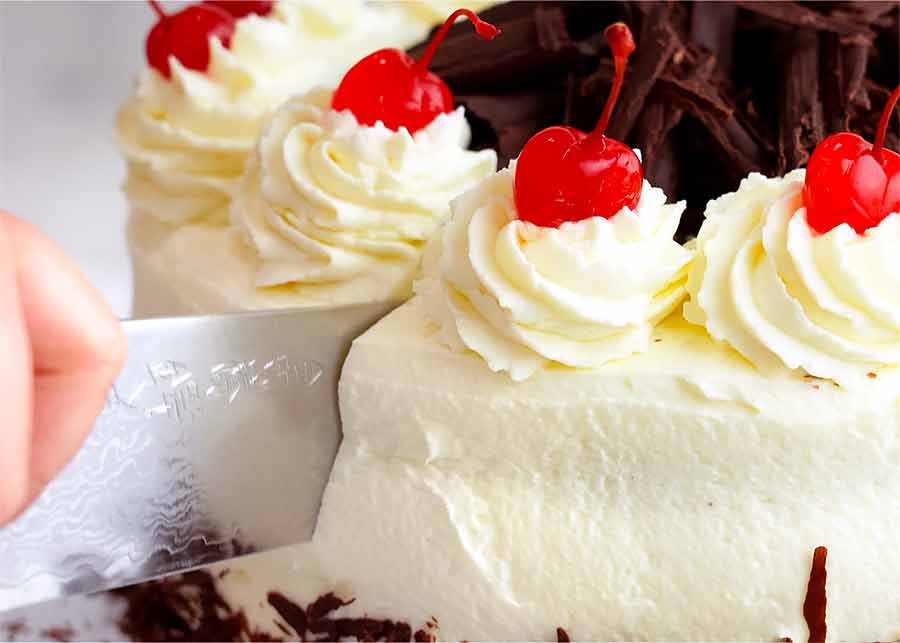
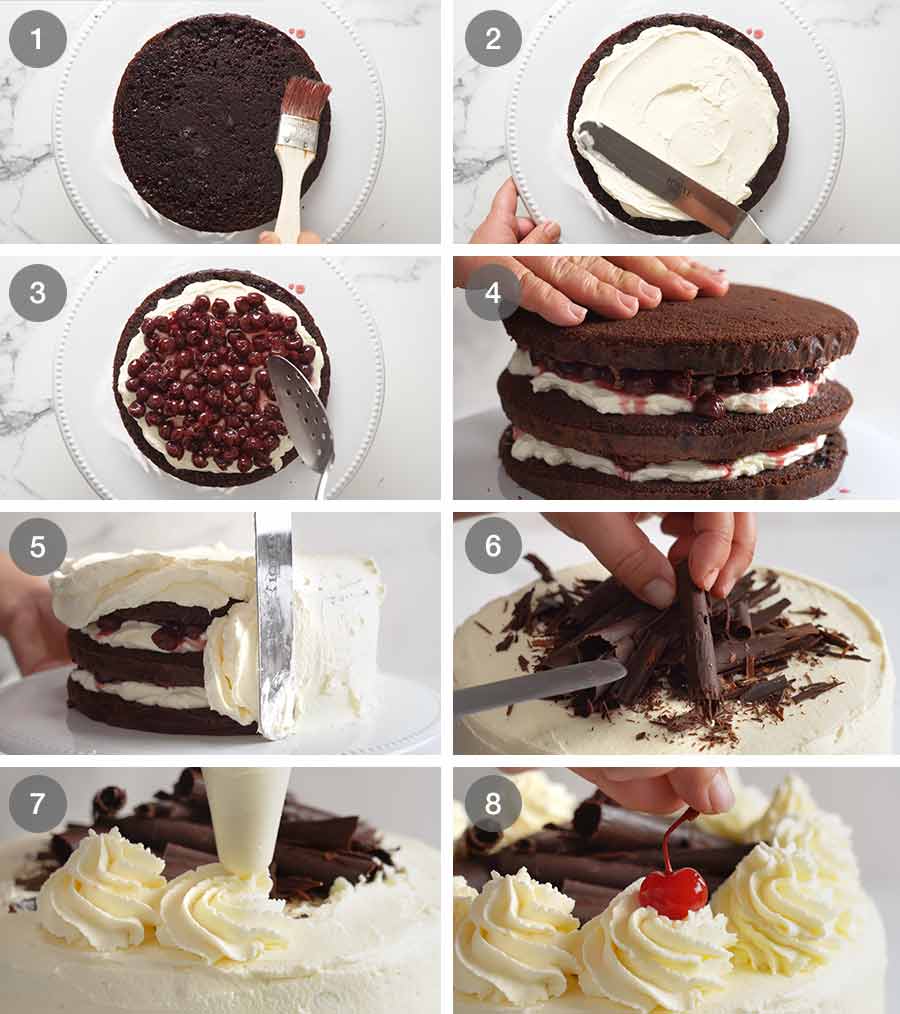
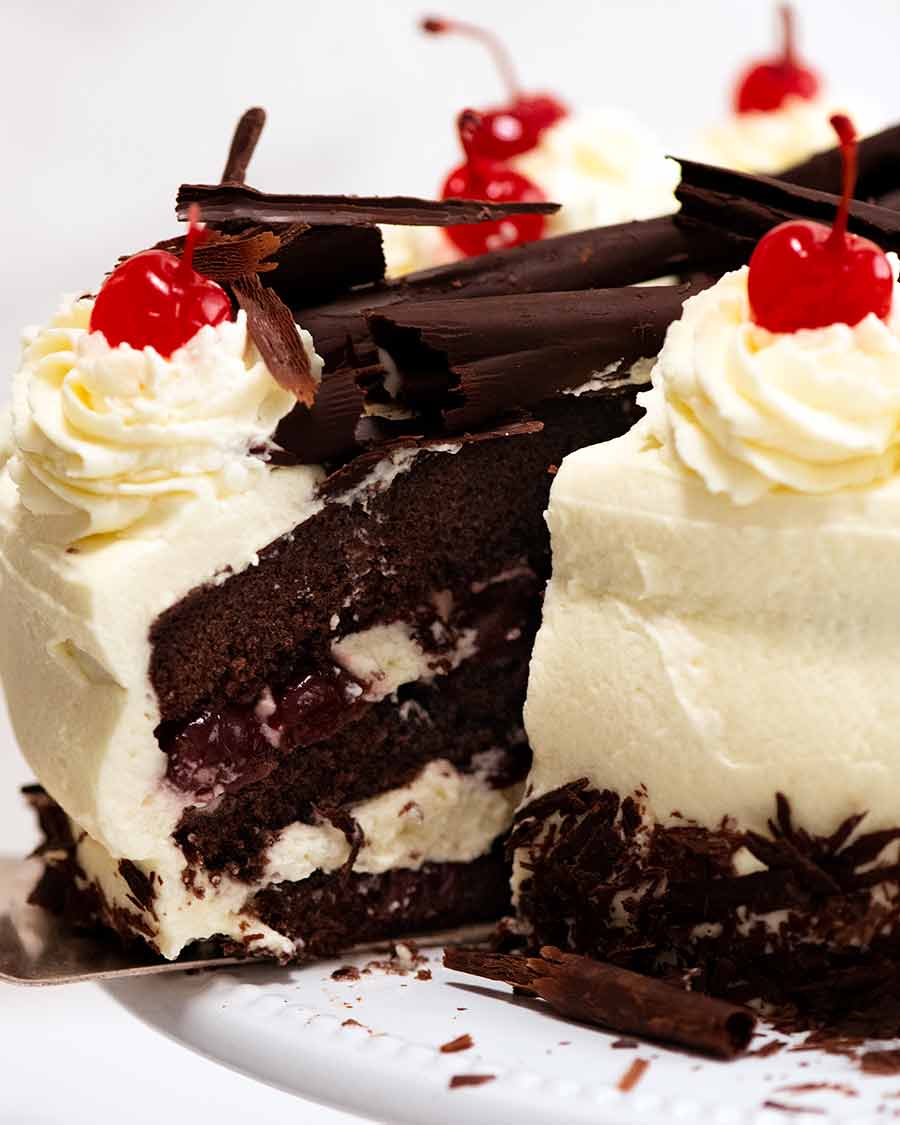
4. Assembling the cake
We’re on the home stretch here! Plus this is the really fun part! Pour the melted chocolate over the back of a baking pan and spread out with a spatula as thinly as possible; Now THIS is what I call a cake!!! All those layers, all those elements – this is the glory of the Black Forest Cake! Finish by brushing the top layer with 1/3 cup of the cherry syrup. You will have some syrup leftover. Then importantly, REST the cake in the fridge for 4+ hours, preferably overnight, to allow flavours to develop and the syrup to really soak into the cake. This step is key for a really great Black Forest Cake, so don’t skip it! Black Forest Cake wraps up German Week here on RecipeTin Eats! This week I shared recipes to make your very own German feast at home. On the menu we have:
Slow Roasted CRISPY Pork Knuckle – Declared by German readers to be better than they’ve ever seen in Germany!! #BestComplimentEverGerman Potato Salad – A warm, German-inspired potato salad with a bacon vinaigrette. You know it’s going to hit the mark!German Cucumber Salad – A refreshing and cooling side that’s perfect with hearty German food; andThis Black Forest Cake to finish with a bang!
And with that, another theme week menu is done! What cuisine shall we tackle next? Leave a comment below! – Nagi x
‘Theme week’ menus from years gone by:
Middle Eastern Mezze & BBQ MenuBig Mexican FiestaSpanish Week!Greek Week!
Watch how to make it
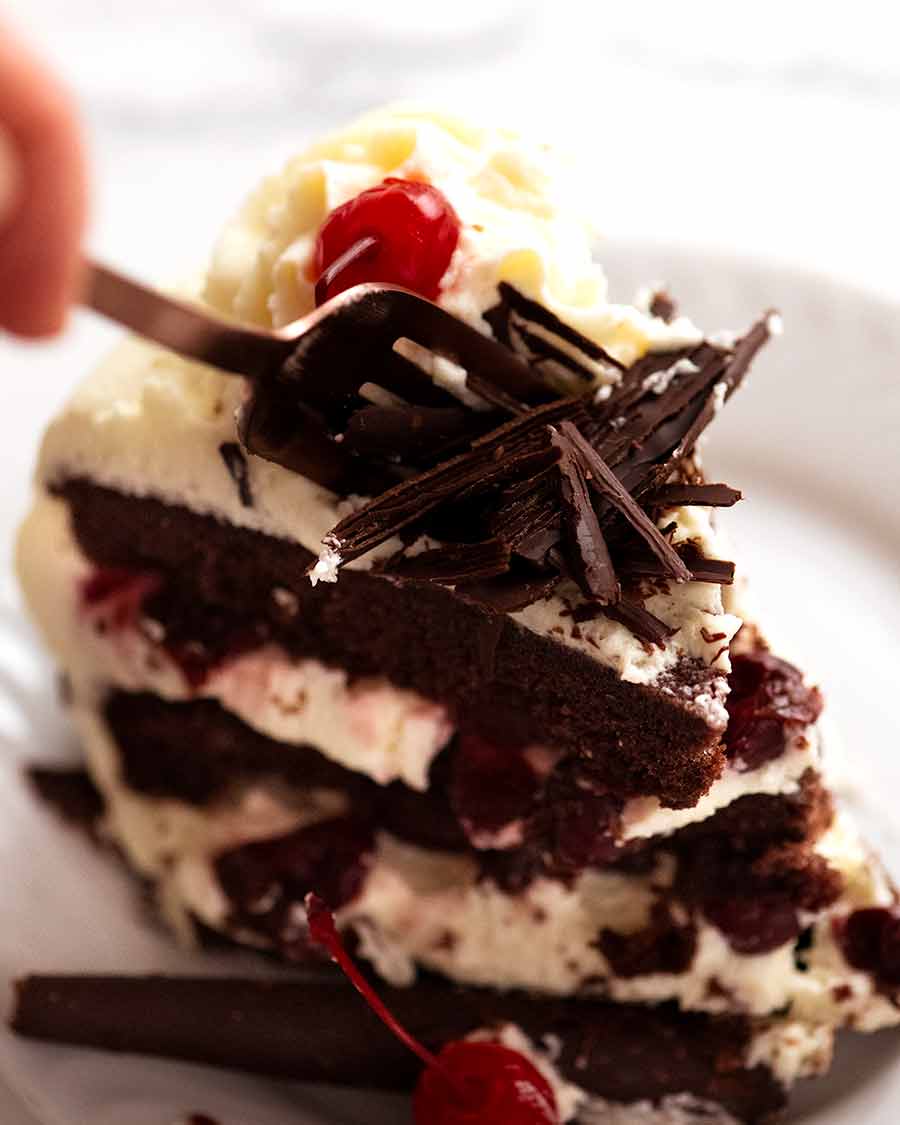
Let them eat cake!
Life of Dozer
Dozer, I promise there’s nothing going on in here of interest to you….😇